A few more pics...
First is a straight shot of Rodan...[url]
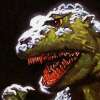
Next is the big Sakai King-Goji(this finishes the kits on top of the T.V.)...
And the last one for now...the Volks vinyl kit of Mecha-Godzilla...
Thats it for now, but more are coming! Enjoy....
Monster Zero x SciFi Japan - Archive Only
The Board is Down with no repair ETR. My apologies but we don't have the money or resources to repair the issue. It is broken on the back-end and is only here to view as an archive. Thank you for your years of patronage.
Any kitbuilders out there?
Moderator: Controllers
117 posts
• Page 2 of 5 • 1, 2, 3, 4, 5
![]() by william newell » Tue Sep 06, 2005 12:32 pm
by william newell » Tue Sep 06, 2005 12:32 pm
- william newell
- Heisei Godzilla
- Posts: 1623
- Joined: Mon Oct 27, 2003 2:29 pm
- Location: Hamilton, New Jersey


![]() by william newell » Tue Sep 06, 2005 2:07 pm
by william newell » Tue Sep 06, 2005 2:07 pm
- william newell
- Heisei Godzilla
- Posts: 1623
- Joined: Mon Oct 27, 2003 2:29 pm
- Location: Hamilton, New Jersey

![]() by william newell » Wed Sep 07, 2005 2:16 pm
by william newell » Wed Sep 07, 2005 2:16 pm
Well, here's the last of my pictures for this thread. Thanks to all for the kind words and compliments, I'm glad you've enjoyed the pictures so far. While most of these final pics are non-Kaiju related, I hope you'll still find them enjoyable...
First is a group shot of(mostly) various scale aircraft...[url]
Next is UPC's R-100 Airship and Mooring Mast kit(actually won a trophy for this one)...[url]
And keeping with the aircraft theme... this is the wall of my apartment opposite of the Godzilla display cases...[url]
And for the final picture, it's back to Kaiju! Yeah, I know, I posted this same pic under the "My Collection" heading, but I thought you might enjoy seeing the paint work on the Roco Mini-Tanks and the Macross 'Mechs one more time...
Well, that's it for my built-ups, don't forget to check out the "My Collection" thread I spoke of before for shots of the kits I still have yet to tackle. It's really been fun sharing these, and something I've been wanting to do for a very long time. I hope you all enjoy them
- william newell
- Heisei Godzilla
- Posts: 1623
- Joined: Mon Oct 27, 2003 2:29 pm
- Location: Hamilton, New Jersey
![]() by william newell » Sun Nov 13, 2005 3:01 am
by william newell » Sun Nov 13, 2005 3:01 am
Hey guys, just a quick heads up, X-O Facto's webpage has a whole slew of Paradise kits available including a 30 inch long Go-Ten from Atragon, the 3 foot tall model of Manda emerging from a cave, and a really nice looking Mothra with a 2 foot wingspan! He also had the Guilala kit, but I snagged that one. Anyway, it's definately worth a look...just thought I'd pass that along.
- william newell
- Heisei Godzilla
- Posts: 1623
- Joined: Mon Oct 27, 2003 2:29 pm
- Location: Hamilton, New Jersey
![]() by william newell » Mon Nov 14, 2005 3:21 am
by william newell » Mon Nov 14, 2005 3:21 am
- william newell
- Heisei Godzilla
- Posts: 1623
- Joined: Mon Oct 27, 2003 2:29 pm
- Location: Hamilton, New Jersey
![]() by canofhumdingers » Fri Nov 18, 2005 12:07 am
by canofhumdingers » Fri Nov 18, 2005 12:07 am
-

canofhumdingers - Burning Godzilla
- Posts: 3046
- Joined: Fri Aug 08, 2003 11:17 pm
![]() by canofhumdingers » Fri Jan 13, 2006 11:40 pm
by canofhumdingers » Fri Jan 13, 2006 11:40 pm
-
canofhumdingers - Burning Godzilla
- Posts: 3046
- Joined: Fri Aug 08, 2003 11:17 pm
![]() by william newell » Sat Jan 14, 2006 12:22 am
by william newell » Sat Jan 14, 2006 12:22 am
I know alot of modeler's like Tamiya Epoxy Putty, but I myself prefer to use Squadron White Putty and have had no problems with paint adhesion, shrinkage, or cracking. And for those wondering, I just recently posted pictures on ImageShack of my Paradise Guilala's construction process, so that info I promised will be posted shortly...sorry for the delay.
- william newell
- Heisei Godzilla
- Posts: 1623
- Joined: Mon Oct 27, 2003 2:29 pm
- Location: Hamilton, New Jersey
![]() by william newell » Sat Jan 14, 2006 1:52 am
by william newell » Sat Jan 14, 2006 1:52 am
O.K. folks, here goes Guilala! First off, a couple of notes. I am going to approach this(hopefully!)in a manner that will assume that the reader has never built a vinyl kit before, so if any of this seems "old news" please bear with me. Also, one of the first things I found out about doing this in a step by step method, as far as the pictures are concerned, is that I don't have enough hands to both hold the model and take the picture so the photographs are not going to be as complete as I had hoped. So if anyone has any questions or needs clarification on anything, by all means, ask away! And for those first time builders, a quick note on saftey(Yeah, yeah, I know we've all heard this before )X-Acto knives are very sharp! Always cut away from yourself so as to avoid a nasty accident. Also, paint, glues, and fillers can sometimes produce strong vapors, so be sure to work in a well ventilated area. And finally, you may wish to wear a pair of disposable gloves to protect your hands from the glues, paints, and fillers used. All right, on to the show....
This first picture is of the materials I will use to build this kit. Most such as paint, glue, etc., are self explanatory. The use of the syringe will be explained in more detail later, when I get to the seam-filling stage. Probably one of the most important items here is the blow dryer. Heating the vinyl makes it easier to cut off the excess flash, and also makes positioning the parts much easier!
This picture shows the kit in all it's unbuilt glory. Always layout the parts ahead of time so that you can figure what goes where, and to make sure all parts are present. In this case, I found out that this kit came with an extra right foot. Sounds like a good subject for a keychain to me...Anyway, back to the kit...
Here's the instructions. As with most vinyl kits, there aren't alot of parts, so the instructions tend to be rather simplistic.
These 2 pictures show a leg, first, with the flash attached, and second, with the flash removed...
And here's a piece of the flash after it's been removed. Be sure to save at least a couple of pieces as they will be useful later.
Here's a body half being heated with the blowdryer to make seam alignment easier. Vinyl kits, especially older ones, will sometimes warp from being packed. A little heat, and the vinyl softens right up and returns to its original shape.
These 2 pictures show the legs being test fitted and aligned. To get the stance I wanted out of this kit, I had to re-position his right leg.With the leg in the position meant, I found that the tail would be between 1 and 2 inches off the ground. For the sake of stability(plus the fact that I think the kit looks better with the tail on the ground) I re-positioned the right leg and then glued it in place. Unfortunately, this created some decent gaps that will require a fair amount of fill. If you look closely at the second picture, you will notice a few "bald spots" as well, so I'll also have to do a little scale re-construction as well. It's all just part of the fun!
This shot shows the kit with the legs, feet, and arms glued in place. It's starting to take shape...
Here's the head. This was the most difficult piece to remove the flash from because of the ridges at the back of the mouth.
Here I'm test fitting the head and lower jaw to the body so as to determine how much the ridges will have to be trimmed for a proper fit. This took a couple of attempts.
Here's the head after the trimming was completed...
And here's the head glued in place on the body.
Guilala, up close and personal! Remember when I said to be sure to save a couple pieces of flash? Here's where they come in handy. This kit had a couple of holes that would be difficult to fill so I took a piece of flash and cut some thin strips roughly the size of the holes and glued them in place. this gives a nice background for the filler to adhere to.
Finally, for now, here's the kit with all the parts(except for the lower jaw, which I don't attach until the end of the build to make painting the inside of the mouth easier)glued in place. That's as far as I have gotten on the kit for now, but next up will be seam filling and scale re-creation. Hope this info is helpful, and once again, don't be shy with those questions!
This first picture is of the materials I will use to build this kit. Most such as paint, glue, etc., are self explanatory. The use of the syringe will be explained in more detail later, when I get to the seam-filling stage. Probably one of the most important items here is the blow dryer. Heating the vinyl makes it easier to cut off the excess flash, and also makes positioning the parts much easier!
This picture shows the kit in all it's unbuilt glory. Always layout the parts ahead of time so that you can figure what goes where, and to make sure all parts are present. In this case, I found out that this kit came with an extra right foot. Sounds like a good subject for a keychain to me...Anyway, back to the kit...
Here's the instructions. As with most vinyl kits, there aren't alot of parts, so the instructions tend to be rather simplistic.
These 2 pictures show a leg, first, with the flash attached, and second, with the flash removed...
And here's a piece of the flash after it's been removed. Be sure to save at least a couple of pieces as they will be useful later.
Here's a body half being heated with the blowdryer to make seam alignment easier. Vinyl kits, especially older ones, will sometimes warp from being packed. A little heat, and the vinyl softens right up and returns to its original shape.
These 2 pictures show the legs being test fitted and aligned. To get the stance I wanted out of this kit, I had to re-position his right leg.With the leg in the position meant, I found that the tail would be between 1 and 2 inches off the ground. For the sake of stability(plus the fact that I think the kit looks better with the tail on the ground) I re-positioned the right leg and then glued it in place. Unfortunately, this created some decent gaps that will require a fair amount of fill. If you look closely at the second picture, you will notice a few "bald spots" as well, so I'll also have to do a little scale re-construction as well. It's all just part of the fun!
This shot shows the kit with the legs, feet, and arms glued in place. It's starting to take shape...
Here's the head. This was the most difficult piece to remove the flash from because of the ridges at the back of the mouth.
Here I'm test fitting the head and lower jaw to the body so as to determine how much the ridges will have to be trimmed for a proper fit. This took a couple of attempts.
Here's the head after the trimming was completed...
And here's the head glued in place on the body.
Guilala, up close and personal!
Finally, for now, here's the kit with all the parts(except for the lower jaw, which I don't attach until the end of the build to make painting the inside of the mouth easier)glued in place. That's as far as I have gotten on the kit for now, but next up will be seam filling and scale re-creation. Hope this info is helpful, and once again, don't be shy with those questions!
- william newell
- Heisei Godzilla
- Posts: 1623
- Joined: Mon Oct 27, 2003 2:29 pm
- Location: Hamilton, New Jersey
![]() by canofhumdingers » Sat Jan 14, 2006 2:04 pm
by canofhumdingers » Sat Jan 14, 2006 2:04 pm
-
canofhumdingers - Burning Godzilla
- Posts: 3046
- Joined: Fri Aug 08, 2003 11:17 pm
![]() by william newell » Sun Mar 12, 2006 7:52 pm
by william newell » Sun Mar 12, 2006 7:52 pm
Well, they say the third times the charm, so here goes...On to stage 2, seam filling...
Before I get into this picture I would like to say that I agree with the above posts about fillers. While I haven't used it myself, I do believe that epoxy putty probably works best for these kind of kits. The reason I haven't used it myself is because every time I run across epoxy putty, I already have Squadron on hand and don't need filler, and then when I do need filler, it seems Squadron is all I can find. So I've kind of adapted to it and think that it works reasonably well.
As for the picture itself, this shows most of the tools I'll be using during this step, most of which are self explanatory. One note about spreaders, I tend to mainly use a sharpened dowel to work the putty while it's still soft, and old dental tools for after the putty has set. However, I have also been known to use a cut piece of vinyl flash if I need something to get into a hard to reach area, and sometimes nothing works better than good old fingers. So feel free to use whatever you think will work the best.
In this picture you finally get to see what the syringe is for! For anyone who's curious, the syringe I'm using came from a local hobby shop. I believe they are meant to be used with R/C cars, but I'm not sure. Anyway, one nice thing about these syringe's is that they fit almost perfectly over the dispensing end of the Squadron tube, which makes filling the syringe rather easy. And for anyone who wishes to try this method...after you use your first load of putty, before you attempt to re-fill the syringe, make sure that there are no blockages, because if there are, the trapped air will not allow the putty to go into the syringe. So instead of a syringe full of putty, you'll end up with a handfull, as I've found out on a couple of occasions .
.
In this picture you can see the syringe being used to apply the putty to the tail seam. Usually, after I finish applying the first round of filler, I will use my sharpened dowel to work the putty and try to match the skin texture as good as possible. Sometimes, after this I find that no further work is needed on the seam, and at the very least, re-sculpting is kept to a minimum. One other note, when I first began building vinyl kits, I would sand the putty smooth and then attempt to re-build the skin texture over this, but I have since found that on something like this, where there is a lot of skin texture, that sanding is completely unneeded.
This picture shows the tail with the seam near completion.
In this picture you can see fill work being done to the leg and foot and of particular interest, you can see the first couple of re-built scales at the top of Guilala's right leg. To do this, I allowed the Squadron to ball up at the end of the syringe before applying it to the model, and after applying it, I used the dowel to shape the surface texture.
Here are the leg and tail after completing the fill work. One thing I will do is after I think the fill work is done to a particular area, I'll paint the area with a color close to that of the original vinyl. This makes it easier for me to see how well everything flows and if any further sculpting work is necessary.
Remember that "up close and personal" shot from step one? Here's the same area after filling and priming. While I'll be the first to admit that my scale replication is far from perfect, I think that the finished product looks adequate, at least to my eye...
These three shots show front, side, and back views after the fill work is near completion. You will notice that the fill work is still "in process" on the head. because of the smooth nature of this area, sanding was necessary to get a good, smooth joint.
Because this kit does not include the parts for the "deeley bopper" antennae, I had to scratchbuild them. This picture shows the items I used. The brass rod came from a local hobby shop, and the wooden beads from a local craft store. When I went to buy the beads, I wasn't sure what size to get so I selected a size that I thought looked right. And to be on the safe side, I also purchased a pack one size larger. Good thing I did, because when I got home and looked at the kit I found that the beads that I thought were the right size were too small, while the beads that I thought would be too big were just perfect. And as to the lenght of the antennae themselves, I determined this by taking a still picture of Guilala that I got off the net, and laid my finger alongside the antennae and took this length(on my finger) and moved it around his head until I found two reference points that were same size. Then all I had to do was move the model itself until the head was in the same position as it was in the picture, and then measure the distance between the reference points and,'viola, correct looking antennae!
This final shot shows the antennae attached and primed. I decided to put a curve into the antennae because the pose on the kit looks rather "action oriented" and I felt that if I left the antennae straight they would look too static. And anyone who's seen the movie knows that his antennae were constantly in motion, so I think the effect works okay.
Well, that's it for this step. Now I can go back to working on the kit with a clear consience, knowing that you all are pretty much caught up. I will say that I have gone a bit further than this, the entire kit has been primed in the color I chose for a basecoat, and I have begun some of the drybrushing, but that will have to wait for the next step . I sincerely hope you all are enjoying this, and I also hope that some of this info is useful! And, as before, don't be shy with those questions or comments!
Before I get into this picture I would like to say that I agree with the above posts about fillers. While I haven't used it myself, I do believe that epoxy putty probably works best for these kind of kits. The reason I haven't used it myself is because every time I run across epoxy putty, I already have Squadron on hand and don't need filler, and then when I do need filler, it seems Squadron is all I can find. So I've kind of adapted to it and think that it works reasonably well.
As for the picture itself, this shows most of the tools I'll be using during this step, most of which are self explanatory. One note about spreaders, I tend to mainly use a sharpened dowel to work the putty while it's still soft, and old dental tools for after the putty has set. However, I have also been known to use a cut piece of vinyl flash if I need something to get into a hard to reach area, and sometimes nothing works better than good old fingers. So feel free to use whatever you think will work the best.
In this picture you finally get to see what the syringe is for! For anyone who's curious, the syringe I'm using came from a local hobby shop. I believe they are meant to be used with R/C cars, but I'm not sure. Anyway, one nice thing about these syringe's is that they fit almost perfectly over the dispensing end of the Squadron tube, which makes filling the syringe rather easy. And for anyone who wishes to try this method...after you use your first load of putty, before you attempt to re-fill the syringe, make sure that there are no blockages, because if there are, the trapped air will not allow the putty to go into the syringe. So instead of a syringe full of putty, you'll end up with a handfull, as I've found out on a couple of occasions
In this picture you can see the syringe being used to apply the putty to the tail seam. Usually, after I finish applying the first round of filler, I will use my sharpened dowel to work the putty and try to match the skin texture as good as possible. Sometimes, after this I find that no further work is needed on the seam, and at the very least, re-sculpting is kept to a minimum. One other note, when I first began building vinyl kits, I would sand the putty smooth and then attempt to re-build the skin texture over this, but I have since found that on something like this, where there is a lot of skin texture, that sanding is completely unneeded.
This picture shows the tail with the seam near completion.
In this picture you can see fill work being done to the leg and foot and of particular interest, you can see the first couple of re-built scales at the top of Guilala's right leg. To do this, I allowed the Squadron to ball up at the end of the syringe before applying it to the model, and after applying it, I used the dowel to shape the surface texture.
Here are the leg and tail after completing the fill work. One thing I will do is after I think the fill work is done to a particular area, I'll paint the area with a color close to that of the original vinyl. This makes it easier for me to see how well everything flows and if any further sculpting work is necessary.
Remember that "up close and personal" shot from step one? Here's the same area after filling and priming. While I'll be the first to admit that my scale replication is far from perfect, I think that the finished product looks adequate, at least to my eye...
These three shots show front, side, and back views after the fill work is near completion. You will notice that the fill work is still "in process" on the head. because of the smooth nature of this area, sanding was necessary to get a good, smooth joint.
Because this kit does not include the parts for the "deeley bopper" antennae, I had to scratchbuild them. This picture shows the items I used. The brass rod came from a local hobby shop, and the wooden beads from a local craft store. When I went to buy the beads, I wasn't sure what size to get so I selected a size that I thought looked right. And to be on the safe side, I also purchased a pack one size larger. Good thing I did, because when I got home and looked at the kit I found that the beads that I thought were the right size were too small, while the beads that I thought would be too big were just perfect. And as to the lenght of the antennae themselves, I determined this by taking a still picture of Guilala that I got off the net, and laid my finger alongside the antennae and took this length(on my finger) and moved it around his head until I found two reference points that were same size. Then all I had to do was move the model itself until the head was in the same position as it was in the picture, and then measure the distance between the reference points and,'viola, correct looking antennae!
This final shot shows the antennae attached and primed. I decided to put a curve into the antennae because the pose on the kit looks rather "action oriented" and I felt that if I left the antennae straight they would look too static. And anyone who's seen the movie knows that his antennae were constantly in motion, so I think the effect works okay.
Well, that's it for this step. Now I can go back to working on the kit with a clear consience, knowing that you all are pretty much caught up. I will say that I have gone a bit further than this, the entire kit has been primed in the color I chose for a basecoat, and I have begun some of the drybrushing, but that will have to wait for the next step
- william newell
- Heisei Godzilla
- Posts: 1623
- Joined: Mon Oct 27, 2003 2:29 pm
- Location: Hamilton, New Jersey
![]() by canofhumdingers » Mon Mar 13, 2006 5:36 pm
by canofhumdingers » Mon Mar 13, 2006 5:36 pm
-
canofhumdingers - Burning Godzilla
- Posts: 3046
- Joined: Fri Aug 08, 2003 11:17 pm
![]() by william newell » Tue Mar 14, 2006 5:02 am
by william newell » Tue Mar 14, 2006 5:02 am
- william newell
- Heisei Godzilla
- Posts: 1623
- Joined: Mon Oct 27, 2003 2:29 pm
- Location: Hamilton, New Jersey
![]() by william newell » Mon Jun 12, 2006 12:48 pm
by william newell » Mon Jun 12, 2006 12:48 pm
- william newell
- Heisei Godzilla
- Posts: 1623
- Joined: Mon Oct 27, 2003 2:29 pm
- Location: Hamilton, New Jersey
![]() by william newell » Mon Jul 24, 2006 12:59 am
by william newell » Mon Jul 24, 2006 12:59 am
Well, I guess it's about time for an update...on to painting!
First I would like to say that this kit has been a bear so far to paint, it's not the kits fault, it's my fault for insisting on doing things "bass-ackward". The reason for this is that this is the first kit where I've used washes to highlight the folds in the suit/kit. Before I would only use washes on the eyes and mouth, but this kit has so many folds and creases that dry-brushing alone looked very 2-dimensional, so I felt washes were in order.
And now a quick explanation of the terms dry brush and wash for those who may not know...
Drybrushing is when you dip your brush in your paint of choice, and then scrub the brush on a piece of scrap paper until virtually all of the paint is out of the brush. then when you scrub the brush on your model, the only paint left in the brush is high up in the bristles and catches only the high points on the model. (I hope that explanation makes some kind of sense...)
Washes are where you thin your paint to the point to where it's more water that paint.(I'm saying water because acrylic paints are what you should be using on vinyl kits...yeah, yeah, I know we've all heard this a million times before ). The purpose for thinning the paint this much is that when you brush it onto the model, it will flow into the recessed areas and increase the illusion of shadows(Now that explanation made sense!)
Anyway, you all will see what I'm talking about as we go along.
These 3 pictures are from a magazine that I picked up at a local convention. The good news is that the magazine has some really good reference photos. The bad news is that I had already decided on my color scheme, and had begun painting before I got this magazine, which wasn't a real problem because one of the pictures was pretty close to the color scheme I had chosen, which brings up another point on painting Kaiju kits. Many times different pictures will make the monsters seem different colors. Notice how the first picture of the magazines cover gives Guilala a decided blue/purple cast(the picture used on the home video packaging looks this way as well) while the last picture gives him a much more greenish gray look, which is actually how he looked in the movie. Basically what I'm saying is, don't be afraid to experiment with color. If that's how you think the kit should look, then by all means, pick what color you think looks right!
Now to actual painting...
The paints I use are almost exclusively Tamiya. I like the way they work but this is strictly a matter of personal preference, use any acrylic paint your comfortable with.
The colors I used were Tamiya purple, medium gray, dark gray, red brown, and desert yellow. I also used Pactra light gray.
Here's my initial prime job. This color I found to be far too grey and had to re-mix my paint to get the color I was looking for. One thing I would like to add here, always save your empty paint bottles as they come in real handy for mixing custom colors in. Just thought I'd pass that along.
 MY GOD HE'S PURPLE! Actually this is just the color I was looking for for the base coat, and am happy with how it worked, I hope you all agree once you see how it worked out.
Here I've begun the drybrush on the leg and tail with the medium grey.
Notice how the drybrush highlights the raised areas.You can see on the paper below the kit where I've been scrubbing out the excess paint from the brush. Also, here's where I first did things wrong and made my job a whole lot tougher. I should have done the washes first and highlighted the lower areas before I began the drybrushing. But, as I stated earlier, this was new territory for me so please forgive my ignorance .
Here's the same area after another drybrush with light gray. I find that drybrushing with lighter coats of lighter colors helps to enhance the 3-D effect.
Here's the kit with it's initial drybrush completed. See what I meant about it looking too 2-dimensional?
Here I've just begun doing the wash on the leg. I'll be the first to admit, washes are the one thing that really give me trouble as they require a lot of patience getting the paint the right consistency and slowly building the color up to the point I want. And patience is definately not one of my strong points! Anyway, you can see how the folds on the leg are begining to get some definition.
This picture shows the preliminary wash completed on one side.
These pictures are actually both the same. They both show the kit with it's preliminary wash completed. The difference in the 2 pictures is that one of the pictures was taken in what my camera calls the "Fireworks" setting. Basically this disables the flash and increases the time the shutter is open. This gives a much more accurate portrayal of the colors on the kit but unfortunately the increased shutter time means that the slightest vibration knocks the picture out of focus, so without a tri-pod, getting good clear pictures in this mode are very rare.
And here's the kit about 3 washes later. After the washes were complete, I then went back and again drybrushed the medium and light gray close to the edge of the folds so that the scales would stand out from the background skin color.
And this is the kit as it stands right now. I'm fairly satisfied with how it's progressed so far. And one other thing I think I should mention, even though it doesn't really show up all that well in the pictures, the claw at the end of the tail and the big ridge in the middle of his back I painted red brown. I then went over this with a wash of the original purple/grey color to tie the brown in with the grey, and over this I did a light drybrush of desert yellow to highlight the edges. I also did a VERY light drybrush of light tan on Guilala himself, just to give him a very light dusty look.
Well, that's it for now, I still have yet to figure out just how exactly I'm going to paint the head. I think I may very well have to break out the airbrush for this, but I'm going to try a few experiments first. thats part of the great thing about building these, it's always a learning experience!
One thing I do know that I'm going to do that I normally don't, seeing as Guilala has no teeth, I see no reason not to go ahead and glue the lower jaw in place. the inside of the mouth should still be easy to paint, and I think this will make blending the jaw in with the rest of the kit alot easier!
Oh well, that's it for now, and as always, questions and comments welcomed!
First I would like to say that this kit has been a bear so far to paint, it's not the kits fault, it's my fault for insisting on doing things "bass-ackward". The reason for this is that this is the first kit where I've used washes to highlight the folds in the suit/kit. Before I would only use washes on the eyes and mouth, but this kit has so many folds and creases that dry-brushing alone looked very 2-dimensional, so I felt washes were in order.
And now a quick explanation of the terms dry brush and wash for those who may not know...
Drybrushing is when you dip your brush in your paint of choice, and then scrub the brush on a piece of scrap paper until virtually all of the paint is out of the brush. then when you scrub the brush on your model, the only paint left in the brush is high up in the bristles and catches only the high points on the model. (I hope that explanation makes some kind of sense...)
Washes are where you thin your paint to the point to where it's more water that paint.(I'm saying water because acrylic paints are what you should be using on vinyl kits...yeah, yeah, I know we've all heard this a million times before
Anyway, you all will see what I'm talking about as we go along.
These 3 pictures are from a magazine that I picked up at a local convention. The good news is that the magazine has some really good reference photos. The bad news is that I had already decided on my color scheme, and had begun painting before I got this magazine, which wasn't a real problem because one of the pictures was pretty close to the color scheme I had chosen, which brings up another point on painting Kaiju kits. Many times different pictures will make the monsters seem different colors. Notice how the first picture of the magazines cover gives Guilala a decided blue/purple cast(the picture used on the home video packaging looks this way as well) while the last picture gives him a much more greenish gray look, which is actually how he looked in the movie. Basically what I'm saying is, don't be afraid to experiment with color. If that's how you think the kit should look, then by all means, pick what color you think looks right!
Now to actual painting...
The paints I use are almost exclusively Tamiya. I like the way they work but this is strictly a matter of personal preference, use any acrylic paint your comfortable with.
The colors I used were Tamiya purple, medium gray, dark gray, red brown, and desert yellow. I also used Pactra light gray.
Here's my initial prime job. This color I found to be far too grey and had to re-mix my paint to get the color I was looking for. One thing I would like to add here, always save your empty paint bottles as they come in real handy for mixing custom colors in. Just thought I'd pass that along.
Here I've begun the drybrush on the leg and tail with the medium grey.
Notice how the drybrush highlights the raised areas.You can see on the paper below the kit where I've been scrubbing out the excess paint from the brush. Also, here's where I first did things wrong and made my job a whole lot tougher. I should have done the washes first and highlighted the lower areas before I began the drybrushing. But, as I stated earlier, this was new territory for me so please forgive my ignorance
Here's the same area after another drybrush with light gray. I find that drybrushing with lighter coats of lighter colors helps to enhance the 3-D effect.
Here's the kit with it's initial drybrush completed. See what I meant about it looking too 2-dimensional?
Here I've just begun doing the wash on the leg. I'll be the first to admit, washes are the one thing that really give me trouble as they require a lot of patience getting the paint the right consistency and slowly building the color up to the point I want. And patience is definately not one of my strong points! Anyway, you can see how the folds on the leg are begining to get some definition.
This picture shows the preliminary wash completed on one side.
These pictures are actually both the same. They both show the kit with it's preliminary wash completed. The difference in the 2 pictures is that one of the pictures was taken in what my camera calls the "Fireworks" setting. Basically this disables the flash and increases the time the shutter is open. This gives a much more accurate portrayal of the colors on the kit but unfortunately the increased shutter time means that the slightest vibration knocks the picture out of focus, so without a tri-pod, getting good clear pictures in this mode are very rare.
And here's the kit about 3 washes later. After the washes were complete, I then went back and again drybrushed the medium and light gray close to the edge of the folds so that the scales would stand out from the background skin color.
And this is the kit as it stands right now. I'm fairly satisfied with how it's progressed so far. And one other thing I think I should mention, even though it doesn't really show up all that well in the pictures, the claw at the end of the tail and the big ridge in the middle of his back I painted red brown. I then went over this with a wash of the original purple/grey color to tie the brown in with the grey, and over this I did a light drybrush of desert yellow to highlight the edges. I also did a VERY light drybrush of light tan on Guilala himself, just to give him a very light dusty look.
Well, that's it for now, I still have yet to figure out just how exactly I'm going to paint the head. I think I may very well have to break out the airbrush for this, but I'm going to try a few experiments first. thats part of the great thing about building these, it's always a learning experience!
One thing I do know that I'm going to do that I normally don't, seeing as Guilala has no teeth, I see no reason not to go ahead and glue the lower jaw in place. the inside of the mouth should still be easy to paint, and I think this will make blending the jaw in with the rest of the kit alot easier!
Oh well, that's it for now, and as always, questions and comments welcomed!
- william newell
- Heisei Godzilla
- Posts: 1623
- Joined: Mon Oct 27, 2003 2:29 pm
- Location: Hamilton, New Jersey
![]() by william newell » Tue Sep 05, 2006 2:03 pm
by william newell » Tue Sep 05, 2006 2:03 pm
Just a quick update...Guilala is finished! Took me long enough , so I'll be able to finish this little project soon, once I get the time to download the pictures and write the text. I must say I'm fairly happy with how the kit turned out. And as before, I hope you all are finding this info helpful, and questions and comments(both good and bad) are always welcome .
- william newell
- Heisei Godzilla
- Posts: 1623
- Joined: Mon Oct 27, 2003 2:29 pm
- Location: Hamilton, New Jersey
![]() by william newell » Sun Sep 24, 2006 2:07 am
by william newell » Sun Sep 24, 2006 2:07 am
Well, Here it is!!!.....
Just kidding
Really though, I figure it's about time that I put personal dilema's aside and finish this little project. As before, I will try to be as comprehensive as possible, but just in case I miss something or I don't expain myself clearly enough, feel free with those questions!
This first picture shows Guilala with his lower jaw glued in place and primed to match the rest of the head. If you look closely, you can see that I have attempted a first wash on his head as well. This was my first sign that techniques I was used to using were'nt going to work here.
Here's an attempt to drybrush. In one word,BLECH! Guess it's time to try that airbrush...
Now that's more like it! This was done with the airbrush using the dark gray paint I was using for the wash leaving the gray/desert yellow exposed on the edges and ridges. Looks like the airbrush is going to work fine...
Here's the head with the "freckles" sprayed in place. I used straight desert yellow for this and was able to get suprisingly close to exactly the effect I was looking for. The freckles were sprayed with the airbrush held approximately one to one and a half inches away from the model, giving quick, small bursts of paint.
After I finished spraying the head, I found the light gray I used to drybrush the body to be far to light, so I went back and drybrushed the body again with the desert yellow, slowly building the color up until the brightness of the light gray was toned down suitably. Which is the key to painting, if it doesn't look right, don't be shy about repainting it till it does(Lord knows I've repainted areas of this kit plenty...).
This picture shows the begining of the part that I was dreading the most...the eyes. Guilala has compound eyes like an insect that are backlit. First off, I have never attempted to paint a compound eye before, and secondly, one thing that I have never learned to paint convincingly(at least to my eye) is something backlit. Because of these two factors, I spent a lot of time looking at pictures of Guilala, watched the movie a couple of times(a nice bonus of doing these kits, it gives a legitimate reason for a little Kaiju Cinema enjoyment), and spent a lot of time just looking at the kit and figuring how the light hits the eyes. As to the picture itself, you can see that Guilala's left eye is complete with shading and spots representing the eye's lenses. The right eye just has the basecoat of yellow with a little orange shading to give the eye some depth(hopefully). I did the blending with the same acrylics I used on the rest of the kit, I just used two brushes(one for the yellow, the other for the orange) so that I could blend the two colors together before the paint began to dry.
And here's both eyes with the preliminary paintwork finished. Pretty much what I was hoping for....
In this picture I've taken the dark gray wash paint and gone around the base of the eye, to tie it to the rest of the head. The final effect was probably as close to the look I wanted as I was going to get, so I was satisfied.
Getting close to finishing ! Here the mouth has been painted a mixture of a very light pink mixed with a little light brown, to tone down the brightness of the pink. Then the mouth was given a wash(hey! mouth, wash, mouthwash! )of straight red. After this, I then went back and gave the mouth another drybrush of the pink. You'll also notice that I have given the claws their first coat of red-brown...
And here's a better shot of the inside of the mouth.
Here's the paintwork virtually completed. As to the claws, I first painted them a straight red-brown(seems like I've heard that before...), over this I gently drybrushed an orange brown that I had left over from painting Rodan, starting at the tip of the nail working back toward the toe. For the last step I took straight yellow and did the same thing, I just made sure with the yellow that there was even less paint in the brush than when I did the orange brown drybrush. This effect I was VERY happy with.
One thing some of you may have noticed, I use flat finish paints almost exclusively, even for the eyes and claws, parts that you would think should be glossy. How do I get the gloss, you ask? Here's a secret of mine that gives a very glass-like finish and adds a fair amount of depth, I coat the eyes, mouth, and claws with thinned down white glue(such as Elmers, Krystal Klear, etc., etc.). I thin the white glue in a mixing bottle with water until it reaches a consistency close to milk, then simply brush a good heavy coat onto the areas mentioned. The glue goes on white, but drys to a very glass-like clear, an effect that I really like and one that you'll see in the final pictue.
Well, here it is, finally, the finished kit at home on top of the entertainment center with the rest of his pals. I hope you've found this informative, and that you'll forgive my taking so long to complete both the kit and this little project. I'm pretty happy with the finished product, and hope that it compares favorably to the new X-Plus figure coming out. My hope is that all this may convince someone to finally break out a vinyl kit and give it a go, because these are actually pretty fun to work on.
Anyway, that's it for Guilala, I hope you like it!
Just kidding
Really though, I figure it's about time that I put personal dilema's aside and finish this little project. As before, I will try to be as comprehensive as possible, but just in case I miss something or I don't expain myself clearly enough, feel free with those questions!
This first picture shows Guilala with his lower jaw glued in place and primed to match the rest of the head. If you look closely, you can see that I have attempted a first wash on his head as well. This was my first sign that techniques I was used to using were'nt going to work here.
Here's an attempt to drybrush. In one word,BLECH! Guess it's time to try that airbrush...
Now that's more like it! This was done with the airbrush using the dark gray paint I was using for the wash leaving the gray/desert yellow exposed on the edges and ridges. Looks like the airbrush is going to work fine...
Here's the head with the "freckles" sprayed in place. I used straight desert yellow for this and was able to get suprisingly close to exactly the effect I was looking for. The freckles were sprayed with the airbrush held approximately one to one and a half inches away from the model, giving quick, small bursts of paint.
After I finished spraying the head, I found the light gray I used to drybrush the body to be far to light, so I went back and drybrushed the body again with the desert yellow, slowly building the color up until the brightness of the light gray was toned down suitably. Which is the key to painting, if it doesn't look right, don't be shy about repainting it till it does(Lord knows I've repainted areas of this kit plenty...).
This picture shows the begining of the part that I was dreading the most...the eyes. Guilala has compound eyes like an insect that are backlit. First off, I have never attempted to paint a compound eye before, and secondly, one thing that I have never learned to paint convincingly(at least to my eye) is something backlit. Because of these two factors, I spent a lot of time looking at pictures of Guilala, watched the movie a couple of times(a nice bonus of doing these kits, it gives a legitimate reason for a little Kaiju Cinema enjoyment
And here's both eyes with the preliminary paintwork finished. Pretty much what I was hoping for....
In this picture I've taken the dark gray wash paint and gone around the base of the eye, to tie it to the rest of the head. The final effect was probably as close to the look I wanted as I was going to get, so I was satisfied.
Getting close to finishing
And here's a better shot of the inside of the mouth.
Here's the paintwork virtually completed. As to the claws, I first painted them a straight red-brown(seems like I've heard that before...), over this I gently drybrushed an orange brown that I had left over from painting Rodan, starting at the tip of the nail working back toward the toe. For the last step I took straight yellow and did the same thing, I just made sure with the yellow that there was even less paint in the brush than when I did the orange brown drybrush. This effect I was VERY happy with.
One thing some of you may have noticed, I use flat finish paints almost exclusively, even for the eyes and claws, parts that you would think should be glossy. How do I get the gloss, you ask? Here's a secret of mine that gives a very glass-like finish and adds a fair amount of depth, I coat the eyes, mouth, and claws with thinned down white glue(such as Elmers, Krystal Klear, etc., etc.). I thin the white glue in a mixing bottle with water until it reaches a consistency close to milk, then simply brush a good heavy coat onto the areas mentioned. The glue goes on white, but drys to a very glass-like clear, an effect that I really like and one that you'll see in the final pictue.
Well, here it is, finally, the finished kit at home on top of the entertainment center with the rest of his pals. I hope you've found this informative, and that you'll forgive my taking so long to complete both the kit and this little project. I'm pretty happy with the finished product, and hope that it compares favorably to the new X-Plus figure coming out. My hope is that all this may convince someone to finally break out a vinyl kit and give it a go, because these are actually pretty fun to work on.
Anyway, that's it for Guilala, I hope you like it!
- william newell
- Heisei Godzilla
- Posts: 1623
- Joined: Mon Oct 27, 2003 2:29 pm
- Location: Hamilton, New Jersey
117 posts
• Page 2 of 5 • 1, 2, 3, 4, 5
Return to Toys, Figures, and Other Collectibles
Who is online
Users browsing this forum: No registered users and 14 guests